Studying abroad is an exciting opportunity that can broaden your academic horizons, boost your career prospects, and offer life-changing cultural experiences. But before you can board that plane and start classes in a different country, you usually have to obtain a student visa. The student visa application process can feel complex and intimidating — it involves paperwork, deadlines, proofs of funds, health checks, and sometimes interviews. This post provides a comprehensive, step-by-step guide to the typical student visa application process so you know what to expect, how to prepare, and how to maximize your chances of a timely approval.
Overview: What a Student Visa Is and Why It Matters
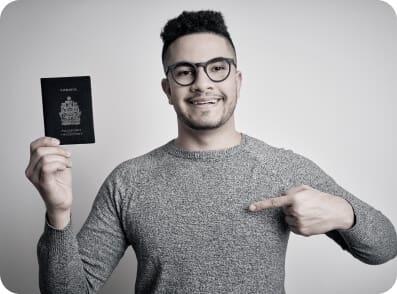
A student visa (sometimes called a study permit, student permit, or entry clearance) is official permission from a host country that allows a foreign national to enter and reside there for the purpose of study. The visa outlines how long you can stay, whether you can work while studying, and any conditions you must follow. Obtaining a student visa is usually mandatory for international students enrolled in credit-bearing programs that last longer than a short-term visitor stay. Visa type, rules, and processing times differ by country, so always consult the relevant embassy, consulate or immigration website for precise requirements.
While specifics vary by destination, the typical process follows these broad stages:
- Offer of Admission: Receive an acceptance letter or authorized confirmation of enrollment from a recognized educational institution.
- Gather Documents: Collect required documents such as passport, biometric data, proof of funds, and health records.
- Complete Application Form: Fill out an online or paper visa application; pay the visa fee.
- Biometrics / Medical Exam: Submit fingerprints/photograph and complete any required medical checks or vaccinations.
- Interview (if required): Attend a visa interview at the embassy or consulate.
- Wait for Decision: Processing times vary; track application status where possible.
- Receive Visa / Permit: If approved, receive visa stamped in passport or obtain electronic authorization.
- Arrival and Registration: Enter the country and complete any on-arrival registration or residence permit formalities.
Step-by-step Breakdown
- Get an Offer of Admission
- Why it’s needed: Almost every country requires proof of acceptance to an educational program that meets minimum criteria (e.g., full-time study at an accredited institution).
- What to check: Acceptance letter should contain program name, course start and end dates, study load (full-time/part-time), tuition details, campus location, and a unique offer or student ID number.
- Conditional offers: If your letter is conditional (e.g., pending final transcripts or tests), you may need to meet those conditions and submit proof before a visa is issued.
- Confirm Visa Type and Eligibility Requirements
- Visa categories: Short-term study visas, long-term student visas, exchange/visitor student visas, post-graduation work permits — each has different rules.
- Eligibility criteria might include age, health, financial sufficiency, and intent (to study, then return).
- Special programs: Scholarships, funded students, or government-sponsored scholars may have streamlined or alternate procedures.
- Prepare Required Documents
Typical documents requested include:
- Valid passport: Usually valid at least six months beyond intended stay.
- Completed visa application form: Online or paper; ensure accuracy and consistency.
- Acceptance letter from recognized institution.
- Proof of funds: Bank statements, loan letters, scholarship award letters, sponsor letters, or affidavits of support showing you can afford tuition and living expenses.
- Tuition payment receipt: Evidence of payment or partial payment may be required.
- Academic transcripts and certificates.
- English language proof: Test scores (IELTS, TOEFL), if required by the institution or immigration authorities.
- Passport photographs: Meet specific size and background requirements.
- Statement of purpose / cover letter: Explain why you want to study the program and how it fits into your future plans (sometimes required).
- Proof of ties to home country: Documents showing intent to return (property, family, job offers) — especially important where immigration suspects potential intent to overstay.
- Police clearance certificate: Proof of no criminal record may be required.
- Medical examination and vaccination records: Required for some countries.
- Biometrics confirmation: Receipt or appointment confirmation for fingerprinting and photographs.
Tips for documents:
- Use originals where required and provide certified translations for any non-English (or non-local language) documents.
- Organize documents in the order requested and include a document checklist as a cover sheet if allowed.
- Make clear, legible photocopies and carry both originals and copies to interviews.
- Financial Proof: How Much Money Is Enough?
- Immigration authorities typically require proof that you have sufficient funds to pay tuition and living expenses for at least the first year.
- Acceptable proofs: Personal bank statements (often 3–6 months of history), fixed deposits, sponsor’s bank statements with a letter of sponsorship, scholarship award letters, or loan approval letters.
- Some countries specify exact amounts (e.g., X amount per month); others accept reasonable estimates tied to the tuition and local living costs.
- If a sponsor supports you, include a notarized sponsorship letter and their financial documents. Immigration may also verify the sponsor’s identity and relationship to you.
- Online Application and Payment of Fees
- Most countries use online visa portals; others accept paper applications.
- Fees: Visa application fee, biometric fee, and sometimes an immigration health surcharge. Fees are typically non-refundable even if your application is rejected.
- Double-check payment methods and confirm your payment receipt; attach or upload proof where required.
- Biometrics, Medicals and Vaccinations
- Biometrics: Many countries require fingerprints and a digital photograph at a visa application center or embassy.
- Medical exams: Required for longer stays or study in certain fields (e.g., healthcare). Exams must be performed by panel physicians recognized by the host country.
- Vaccinations: Some countries require proof of vaccines (e.g., meningitis for students in the UK or certain countries’ COVID requirements when they were active).
- Timing: Medical results and biometric appointments are time-sensitive; plan them within the validity window specified by the immigration service.
- Visa Interview (where applicable)
- Purpose: To verify authenticity of documents, assess intention to study, confirm funds, and evaluate ties to home country.
- Common questions: Why did you choose this course and institution? How will you fund your studies? What are your career plans? Do you intend to return home after finishing your program?
- Preparation: Be honest, concise, and consistent with written statements. Bring originals of all documents, and dress neatly and arrive on time.
- Waiting for a Decision
- Processing times vary greatly by country, season, and applicant volume — from a few weeks to several months.
- Some countries provide trackable application portals and email updates. Others may require you to wait for physical notification.
- If processing is delayed or you have special circumstances, contact the appropriate visa office or check their published timelines before escalating.
- Receiving the Visa and Travel Preparation
- Approval: You may receive a visa sticker in your passport, an electronic visa (e-visa or eTA), or a pre-approval letter that you present on arrival.
- Check the visa details carefully: duration, entry allowances (single/multiple), study restrictions, and any special conditions (work limitations, reporting requirements).
- If you’re granted a limited-duration entry or pre-approval, you might need to collect a formal permit within the country (for example, a residence permit or student ID card).
- Make travel plans: Book flights, check baggage restrictions for any medications or immunizations, and prepare arrival documents to present to border officials.
- Arrival, Registration and Post-Arrival Requirements
- On arrival you may need to:
- Present your passport with visa and offer letter.
- Complete immigration forms and answer arrival questions.
- Register with local authorities, university international office, or police within a set period.
- Apply for a residence permit or local ID card within a certain number of days.
- Attend orientation or provide biometric data for in-country permits.
- Housing and health insurance: Finalize accommodation and sign up for required health insurance as per local regulations or university rules.
Common Country-Specific Differences (high-level examples)
- United States (F-1, J-1):
- Requires Form I-20 issued by the school.
- Pay the SEVIS I-901 fee, complete DS-160, attend a consular interview.
- Financial proof and intent to return are assessed.
- United Kingdom (Student Route):
- Confirmation of Acceptance for Studies (CAS) number required.
- Immigration Health Surcharge (IHS) often required.
- Tuberculosis test and proof of funds for maintenance.
- Canada (Study Permit):
- Letter of Acceptance from a Designated Learning Institution (DLI).
- Biometrics and medical exam may be required.
- May need a Temporary Resident Visa (TRV) or Electronic Travel Authorization (eTA) depending on nationality.
- Australia (Subclass 500):
- Confirmation of Enrollment (CoE) required.
- Health insurance (OSHC) mandatory and medical checks sometimes required.
- Schengen States (for non-EU long programs or exchanges):
- National long-stay visa or residence permit procedures depend on the specific Schengen country.
- Often require proof of accommodation and local sponsor details.
Common Reasons for Refusal and How to Avoid Them
- Insufficient financial proof: Provide detailed and verifiable financial documents and explain any unusual transactions.
- Incomplete or inconsistent documentation: Ensure all documents are complete, translated correctly, and consistent across forms.
- Lack of genuine intent: Be prepared to demonstrate clear academic objectives and post-study plans that indicate you are a bona fide student.
- Missing or expired documents: Check all expiry dates (passports, police certificates) and submit within validity windows.
- Criminal record or health concerns: Address these transparently and provide rehabilitation or medical reports where relevant.
- Administrative errors: Double-check application IDs, passport numbers, and ensure fees are correctly paid.
Practical Tips to Smooth the Process
- Start early: Begin the visa process as soon as you receive an unconditional offer — processing can take weeks to months.
- Keep digital and physical copies: Maintain scanned copies of every document you submit and originals to carry to your appointment and on arrival.
- Follow the embassy’s checklist: Use the official checklist from the host country’s immigration website or consulate, not third-party advice alone.
- Be honest and consistent: Inconsistencies between your application, interview answers, and supporting documents raise red flags.
- Use institution resources: Most universities have international student offices that offer visa guidance; use them.
- Plan finances conservatively: Show that you can cover unexpected expenses and avoid last-minute large cash inflows into accounts just before application — these can be questioned.
- Consider professional help for complex cases: Immigration consultants or lawyers may be helpful for sponsorship complexities, appeals, or unique situations, but verify credentials and avoid scams.
After Approval: Rights and Responsibilities as an International Student
- Work rights: Different countries allow varying numbers of work hours while studying; clarify restrictions and follow them to avoid jeopardizing your status.
- Visa extension: If your program is extended or you plan to pursue further study, learn the rules for extending or switching visas.
- Maintain student status: Satisfy enrollment, attendance, academic progression, and reporting requirements to retain your visa.
- Travel: Re-entry rules differ; check whether you need a re-entry permit or whether your visa allows multiple entries.
- Post-graduation options: Many countries offer post-study work permits or pathways to permanent residency — familiarize yourself with these early so you can meet any application timelines.
What to Do If Your Application Is Denied
- Read the refusal letter carefully: It will usually state the reason(s) for refusal and whether you can appeal, reapply, or request administrative review.
- Assess the reason: If documents were missing or information incomplete, gather the correct materials and apply again.
- Consider appeal or review: Some countries allow appeals within a timeframe; consult the embassy’s instructions or a qualified immigration lawyer.
- Reapply with stronger evidence: Address the specific points raised in the refusal letter — for example, strengthening proof of funds or clarifying intent.
- Don’t ignore deadlines: If you reapply or appeal, ensure you meet any deadlines for course enrollment or defer admission with the school if necessary.
Final Checklist Before Applying
- Accepted and unconditional offer from institution.
- Passport valid for required period.
- Complete visa application form filled accurately.
- Proof of funds (bank statements, sponsor documents, scholarships).
- Tuition payment proof or bond, if applicable.
- Proof of accommodation or intent to secure housing.
- Medical exam or vaccination certificates (if required).
- Police certificates and academic transcripts.
- Passport photos meeting specifications.
- Biometric appointment scheduled or completed.
- Visa fees and any surcharges paid.
Conclusion
The student visa application process is a critical step in studying abroad. While requirements and procedures vary by country, the most important themes are preparation, documentation, honesty, and timing. Start early, follow the official guidance from the embassy and your institution, organize your paperwork carefully, and be ready to explain your academic and financial plans clearly. With careful planning and attention to detail, you can navigate the visa process successfully and focus on the exciting experience of studying in a new country.